Is it possible to install Linux on a USB flash drive. Starting Ubuntu system from a flash drive. Creating a bootable drive using Unetbootin.
Install Ubuntu A flash drive has several advantages over installing from a CD. Firstly, not all computers have a CD drive at all (this is especially true if you need to install Ubuntu on a netbook). Secondly, linux installation from a USB flash drive it is much faster than from a CD (and this is especially important when "pipelined" installation on several computers). And thirdly, compact discs in general have very unpleasant properties to scratch and quickly fail.
Yours may be different from each other to match your configuration. To do this, enter the following command. "Disabling all volumes on disk2 was successful." If you downloaded and unzipped the disk image into the download folder, running this command will take you there. Now run this command to start copying.
Go insert a kettle and brew! In the end, you'll see something similar to the above, and it probably took a while too. We are almost done at this moment, one more step. This will delete the partition. You will be asked to tackle the first sector, setting this as the beginning of section 2, as noted earlier.
So, how do you create a bootable USB flash drive with Ubuntu Linux? To get started, you need the Ubuntu disk image or the CD itself. If you don’t have one yet, read where to get it.
Creating a Ubuntu Bootable USB Flash Drive
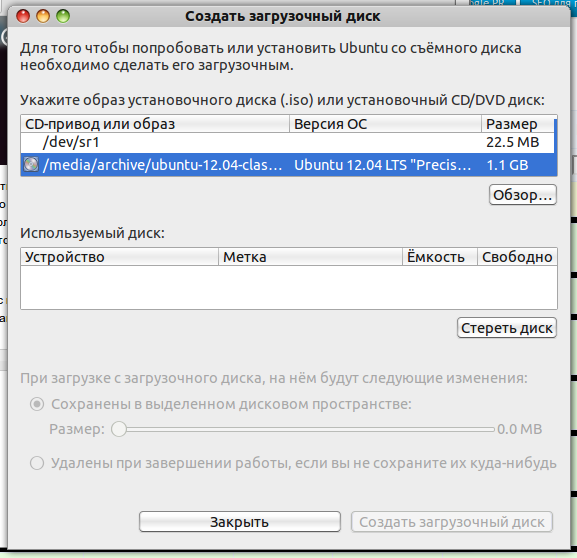
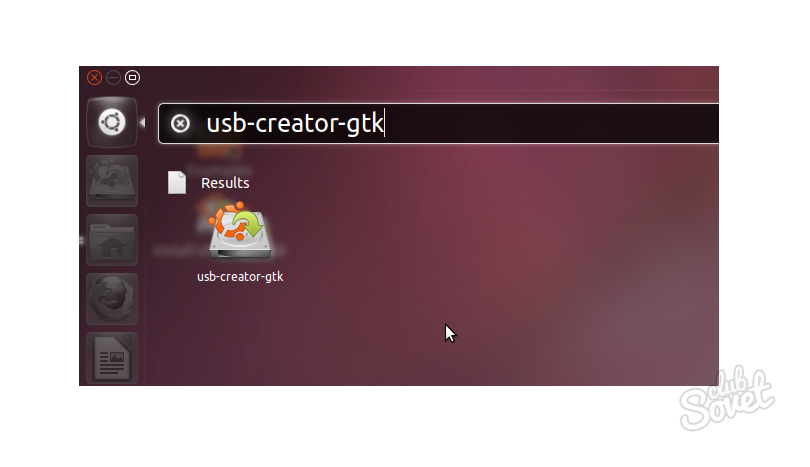
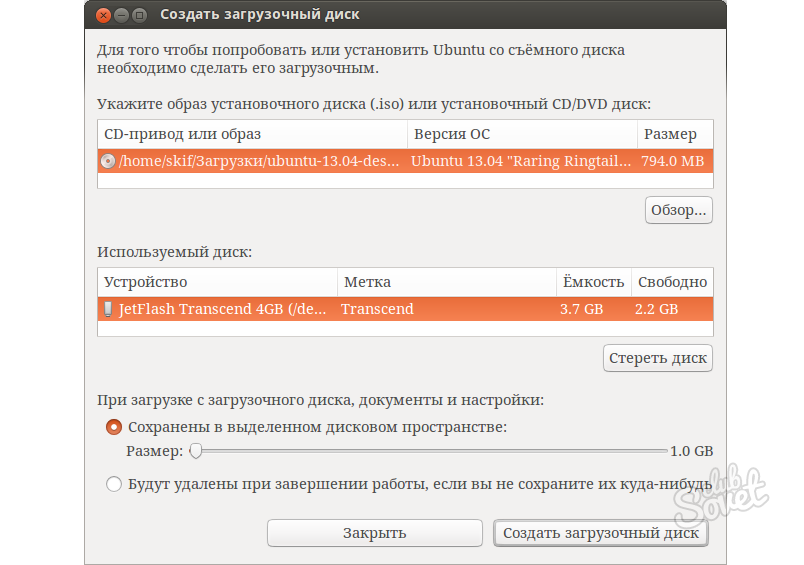
So, the first way to create bootable flash drive designed for anyone who works in any ubuntu versions or able to boot from Ubuntu LiveCD. Ubuntu has a special usb-creator-gtk utility for this. To start it, press ALT + F2 and enter "usb-creator-gtk" or in the application menu we look for "Create boot disk".
Be patient, it will take some time. Views and thoughts are my own. 
In any case, you can use it as the main disk. This article only explains how to use the download version. My reason for using this tool compared to others is that it works flawlessly every time without much hassle.
Considerations All you need is a free utility for flash drives. This procedure will reformat the disk and erase its contents. This is a great way to test the operating system to make sure that it works with the hardware of your computer and make sure that you are comfortable with it before installing it on your hDD.
This program is ugly simple: we select the drive device, where it stands ubuntu drive, or the Ubuntu ISO image file, below we select the flash drive device. If necessary, you can also allocate space on the USB flash drive to save personal files and settings (if you do not, then when working with the USB flash drive they will be lost every time you reboot - but if you need a USB flash drive not for work, but only for installation - you worry should not).
Just select the appropriate version for the operating system that you are currently using. If you already have a disk image, go to step. If you already have a disk image on your desktop, it only takes a few minutes. If everything goes according to plan, the application must first download the files, then extract them and copy them to a flash drive, prepare a buffer, and then notify when the process is complete.
At the end you will see a message asking if you want to reboot. The steps for this will be different for each computer. On some computers, you may not have a boot device menu. Follow the onscreen instructions. If all goes well, you'll probably see a lot of text flying across the screen before you move on to the more familiar graphical user interface.
Creating a Ubuntu Bootable USB Flash Drive on Windows
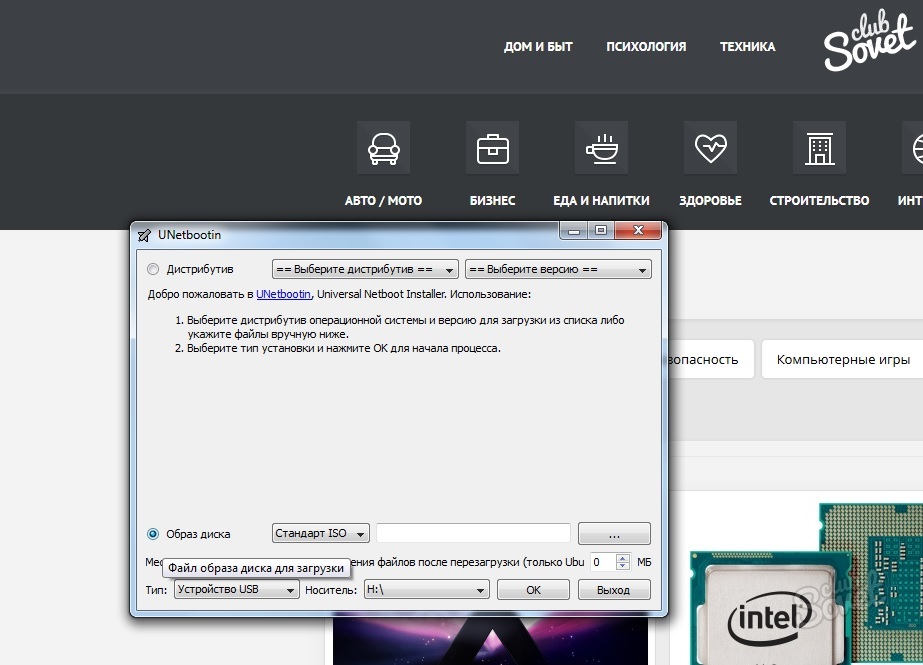
If you have only Windows OS at your disposal and you cannot boot from the Ubuntu CD for any reason either, then there is a special utility for creating a bootable Linux USB flash drive - UNetbootin. You can download this program.
Programs you may need to download. This can take anywhere from 15 minutes to 30 minutes, depending on the speed of your system. At some point, the progress bar will freeze until it is completed, and this is the longest process.
Creating a Ubuntu Bootable USB Flash Drive on Windows
It does not save installation files for installation on another system. Now with all the necessary components, we can begin the process. Here you will want to disconnect the hard drive. The first 3 screens are the language, time zone and keyboard layout. Give him permission to unmount. This is a ready screen for disk space.
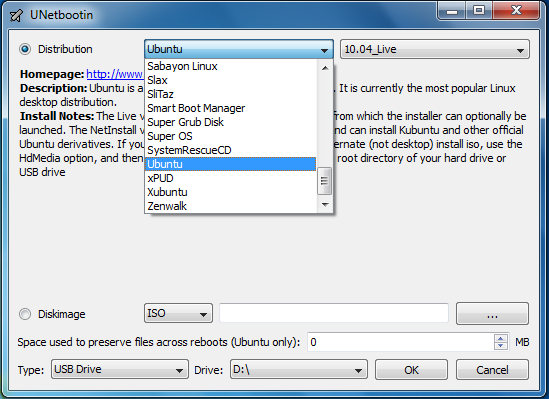
Here, everything is also quite simple: we select the distribution kit in the upper list (its program will download itself), or the already downloaded disk image file (Diskimage). At the bottom of the window, select the flash drive. If necessary, we allocate additional space for storing personal files (Spase used to preserve files across reboots).
Now you will see the login screen and user information. At some point during the installation, you may notice that a skip button appears in the lower left corner. This should skip automatic updates and finally language packs.
This may take some time, mine took about 35 minutes. When this is done, remove the disc and turn off the computer. With more new version This option is no longer available. As with all firmwares, there is a chance that something will go wrong that will make the device useless.
There is a second step to providing full access to developers. Of command line log in as chron. He will not ask for a password. However, most installers will handle this for you. Overview of sections. Users of other operating systems must use one or more. The output is block by block for each disk. The first line of output may look like this.
Operating system Linux Ubuntu can be installed both from a CD and from a flash drive. In the latter case, the installation is quite comfortable: all the information on the USB flash drive will remain safe and sound, and in addition, it will be installed on the computer faster than from the disk. So, the whole process of installing Linux Ubuntu on a computer using a flash drive is described below.
Video: Creating a bootable USB flash drive with OS
The rest of the line refers to disk size. If it loads alone, it also appears as the output of the block. Another block output appears under already known releases. The exit is very important to determine the location for installing the bootloader.
Direct installation or exit from real time
However, there are a few things to consider, which are explained below. In addition, you can also ask for support in the appropriate support forum. Installation on external storage described in the article. Then the following options are offered. The second figure provides an overview of which buttons can be used in possible useful tools. Depending on whether you have an unused hard drive or have already created partitions - perhaps with an additional operating system installed, the window that appears looks different: Dialog box installation type with an empty dialog box hard drive Installation type if other operating systems are already available Automatic or semi-automatic partitioning. The entire hard drive is permanently deleted and used to new installation. The bootloader is written to the main boot record first hard drive. Before installation - the installation described below starts. . Advanced options: all of these options can also be selected whether the system should be populated or sections should be created in one.
Mount point Type of section, i.e. Whether a primary or logical partition should be created. The location of the new section, i.e. whether it should be applied at the beginning or at the end of a free memory area. “Delete partition”: c - the partition can be completely deleted. The operation must be confirmed in the next request.
The space thus obtained can now be used for new partitions. If necessary, simply delete the partition and recreate it. If necessary, the insertion point for the partition intended for this purpose should be adapted. Since the swap space is unlikely to ever change, it might be a good idea to put it at the very end of the hard drive, so it will not interfere if other partitions are changed.
- It is often believed that 1, 3 times more memory installed in the system.
- There is no rollout point in the swap sections.
Preparing to Install Ubuntu
If you're not sure what to do, keep the bootloader by default! This first system is the main system that controls all other systems. This second pit 2 or its separate boot menu then called by the pit of the first system. After all the settings have been made, click "Install Now."
Time zone, keyboard layout, and user data
The following three dialog boxes specify basic settings for the system and the main user. If another hard drive is already installed on the hard drive on which you are installing operating system, this window may still appear. Here, the installation program offers to transfer existing data, such as bookmarks and file settings from the section to other installations. To do this, you must select the selection option on the corresponding line. If no records are selected, data is not accepted.
Current installation and reboot
It should be used with caution, since a newly installed system can immediately transmit inconsistent data. Perhaps the best way to transfer data with a pre-stored backup manually. In the next installation dialog, the installation is completed and progress is displayed. When installation is complete, restart the computer. However, you can still stay on the live system for a while, but you should be aware that changes made to the system will not apply to the new installation.
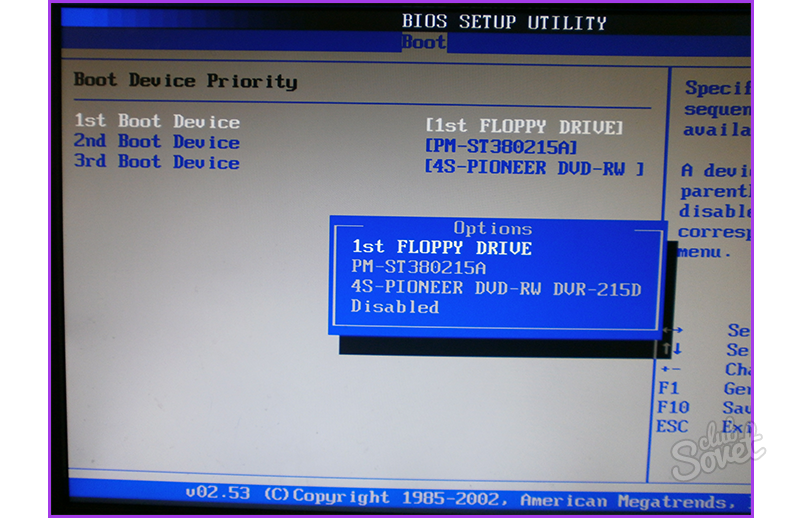
After the computer restarts, the Linux installation will start from the bootable USB flash drive. Further actions of the installer are determined by the user, until the installation process is complete, the flash drive must be connected to the computer.