Install Windows from the hard drive. How to install Windows directly from a hard drive using various methods? Installation on top of the old system.
There are times when we have been using an optical disc with an operating system for a long time as a stand for hot tea. Winchester died the death of the brave. To purchase a flash drive or external hard drive have not yet earned. In general, the wife left us and the End of the World came. Situations are not pleasant and are probably familiar to everyone. If you can somehow come to terms with the departure of your wife 🙂, then with the need to reinstall operating system right now and immediately, alas, impossible.
Determine free disk space
The first thing you need to do is determine if there is enough free disk to partition. If your disk is similar to this one and has more free space than space, then you have no problem. You can go straight to step 2 below. But what if you do not have such free space? At first glance, it might seem that there is not enough space, but in fact it is still possible.
Let's determine how much data you really need to move. Then the folder size will be calculated. Record the final calculated figure for “Disk Size”. Do the same for the Documents and Settings and Program Files folders, and then add the total disk space made by these three folders. For example, let us say that you came up with these numbers.
What do we do? Consider the method of installing a clean operating system from the main hard disk HDD, without using the gadgets described above.
Take a handful of flour. Stir with eggs and milk. Then a tablespoon of sugar and a pinch of salt ... Sorry friends 🙂, one eye squinting at the kitchen and therefore such hallucinations.
Of course, download the program from the official website of the developers (you can use WinRaR). And a free utility. Where to find ISO - windows image I hope you do not need to be taught.
Installation Launch Options
We do not transfer any of the files in the system space to our new partition, so we do not need to allow this space on this new partition. The difference is how much data you have to move to the new partition. The amount of data needed for backup and deletion can be easily calculated using the formula.
Do not go to step 2 until you free up disk space. Read burner instructions for help. If so, you may find this guide useful. Step 3: Prepare Your hDD for markup. Checking the disk may take some time; everything from 5 minutes to two hours depending on the size of your disk and the number of files on the disk. This is actually all you need.
First we need to create a partition on the disk where we will copy the installation files for Windows 7, 8, 8.1. Alas with pigs (WindowsXP) this method does not work.
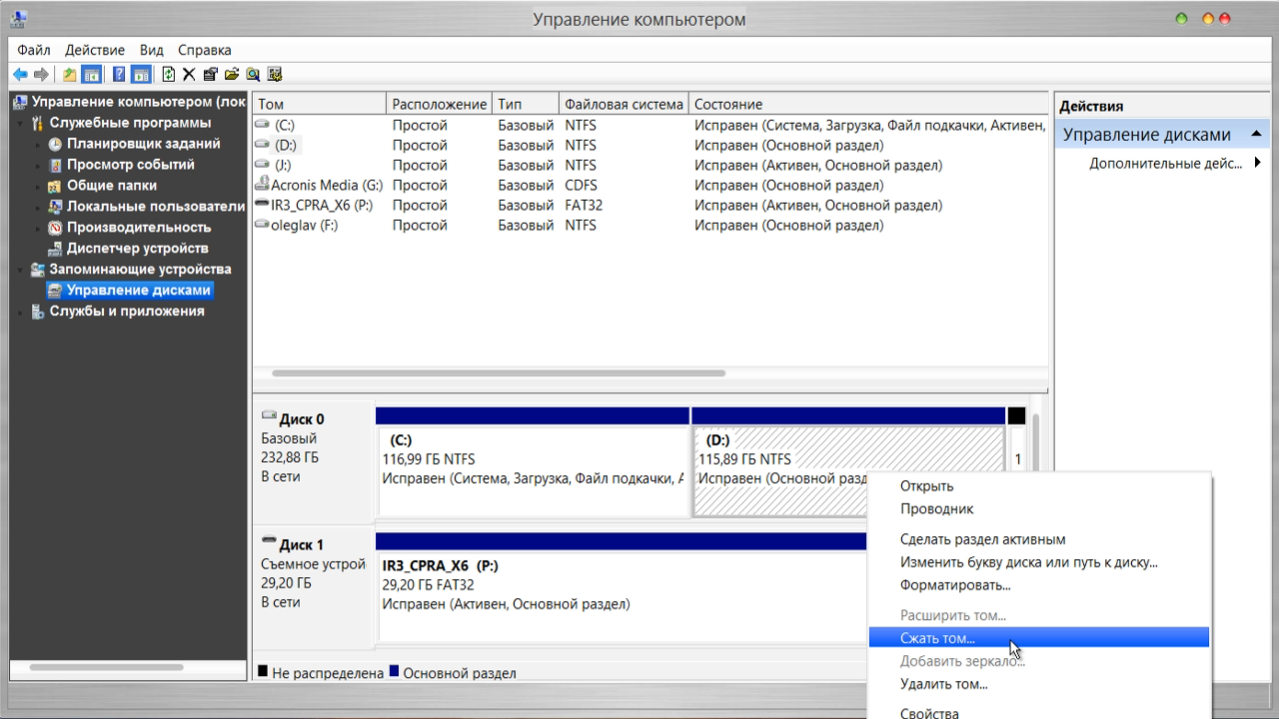
So let's get started. For this by shortcut My computer click right click → Manage → Disk Management.
We see all the information about the hard drive connected to the computer. It is desirable that the disk has already been divided into two parts. Getting to the division Drive (D :). Point to it with the mouse cursor and right-click. Choose → Compress Volume.
A request is made for a place to compress, what size can be compressed.
![]()
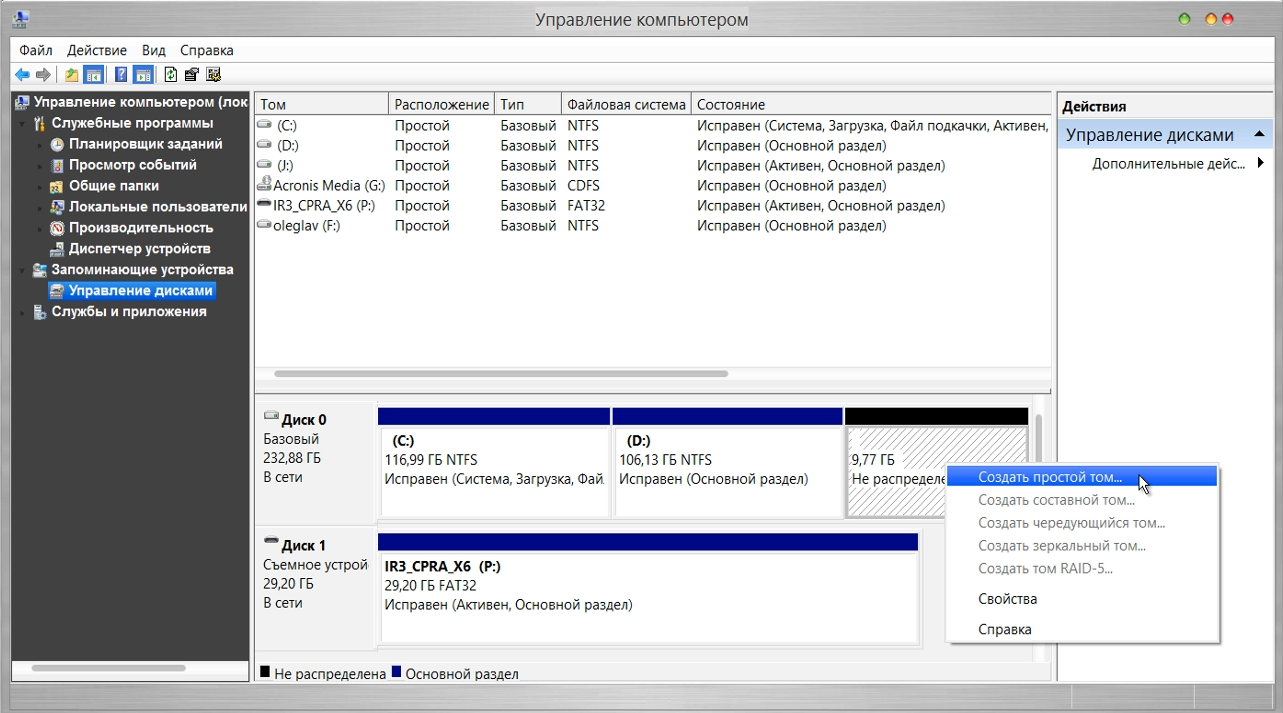
At the moment, the size of the compressible space is important to us (Mb :) It needs to be set not much larger than yours ISO - image. After the desired size has been set, press the button Squeeze. A short process and an unallocated space appears, we will transform it into a simple volume. Point the mouse at the unallocated space. Next, right-click and select in the drop-down menu Create a simple volume.
The Create Simple Volume Wizard launches. In all windows, click Further and in the very last window click Done. Our new volume has been successfully created.
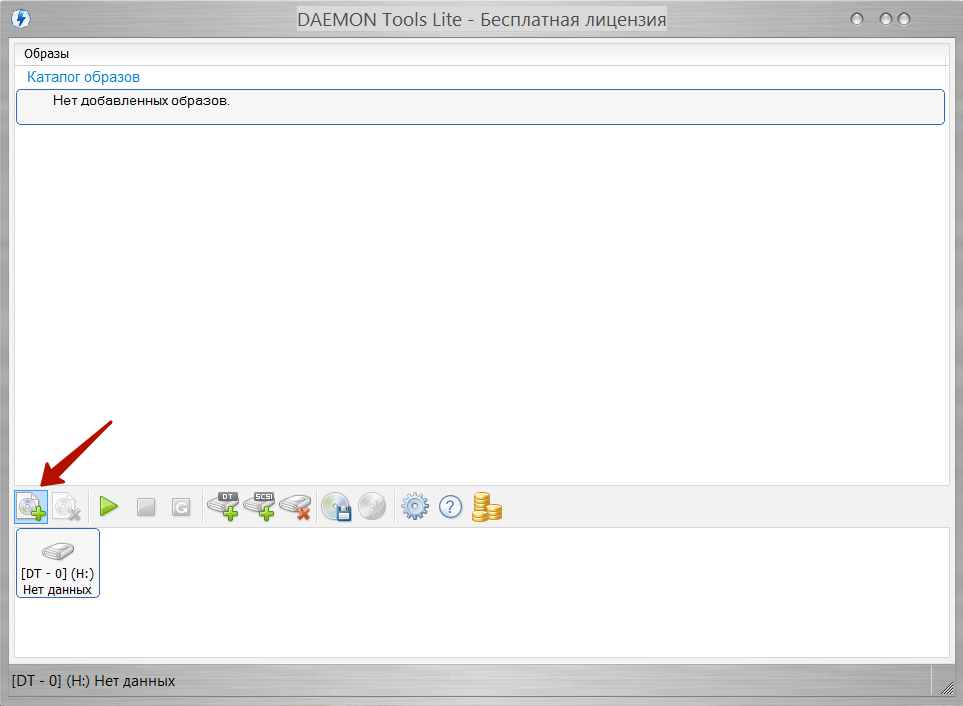
Having sweated sweat from the face, we open the program DAEMON Tools Lite. Click on the button Add Image.
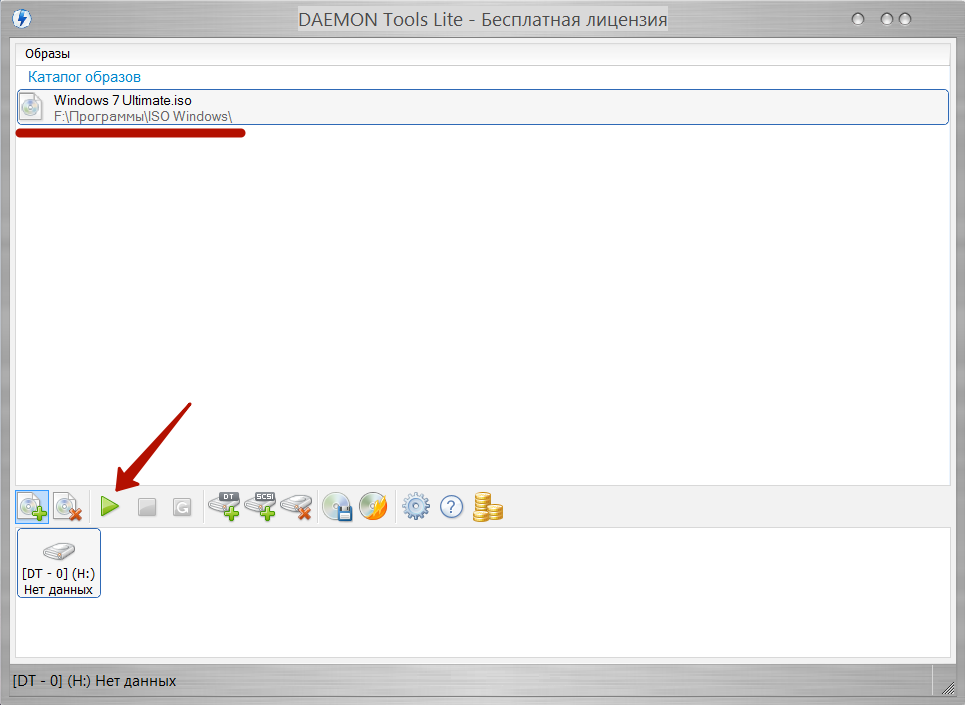
We recall where we have “hidden” on our computer ISO - operating system image. Successfully add an image to the program. In the image catalog, select it with the cursor and click on the button. To mount.
Close the program DAEMON Tools Lite. The installation image of the operating system is successfully mounted in a virtual drive (we look in the explorer). Copy all the content to ours new disc. In our case, this New Volume (E :).
We launch EasyBCD to add a boot record and start the installation of the system.
- Press the button Add a note
- Select the tab below Winpe
- In field Name: we write the same thing as on the new, just created section, in our case: New volume
- In field Way select file boot.wim from folder sources our created disc
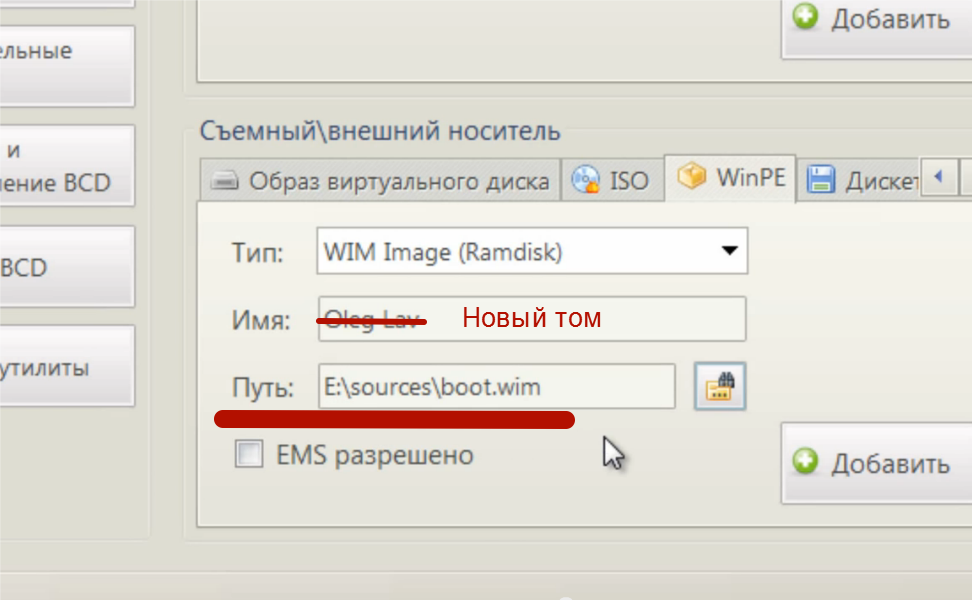
- Push button Add
If it is not clear what I wrote, carefully watch the video (there all the actions are described clearly)
By clicking on the button Current settings You can check if a new record has appeared. EasyBCD You can close and restart the computer. An OS selection menu will appear, in which we select our installation disk New volume. And the standard installation of the system will begin. Detailed installation system and all of the above, see the video. Yeah! This is a "zapara" many will think. And they will breathe a sigh of relief when their wife 🙂 returns. Now there is something to do, and not read these abstruse tips for reinstalling the operating system.
This method does not work on computers with BIOS UEFI. For cooler computers you can apply.
Help the victim of the capitalist cataclysm. Share the post in the social. networks: