Install tomcat ubuntu. Install Tomcat under Windows. Create Tomcat User
The idea to write this article about installing and configuring, probably, one of the most popular web servers in Java has arisen for a long time. One of the reasons was the desire to make a short note "for myself" with detailed instructions. Perhaps this article will also be useful to other java programmers. There is not much benefit for anyone else, for example, for system administrators. Most likely they will simply do this: apt-get install tomcat8 and then they ask the programmer for war-ik for deployment. A programmer often wants a little more - for example, the ability to work with different versions of servers (which may not even be in the official repository yet), or vice versa, roll back to some specific version. As a rule, such studies are not needed by the system administrator. In a good way, he should have just a stable working version, on which he will periodically roll updates and once again not breathe on it.
Change default ports
Note. Replace the version number above with the latest version if it is different. Once you enter your user credentials, you will find a page similar to the one below. That's all, the server will run on port 80. On the other hand, when you think that this can be achieved different ways, these methods differ from platform to platform, and when it comes to it, if you can’t start your server, you’re really bound to talk a lot. To simplify the task, we divided the manual into three large sections: “Manual start”, “Automatic start” and “Remote start” with the necessary additional subsections for the platform and method.
In general, this article is about how to programmer install Apache Tomcat under Linux in order to "play around" with it, but at the same time not to break anything much.
This article can also be useful in cases where a novice java programmer, having debugged his Tomcat web application running on Windows, is faced with a burning desire to deploy his site on some inexpensive VPS with Ubunt.
This ensures that if the machine reboots for any reason, the server will return to online mode, even if it is used in a blade server environment without a screen or user to interact with it, and also offers additional protection. This is beyond the scope of this article, but do not worry! Standard binaries do not do this, so you have to write your own initialization script. Replace the initialization script name for the placeholder.
Create Private Instance
Fortunately, you do not need to do all this work yourself. There are a few drawbacks to using this technique. Secondly, it is rather unreliable, since it will not provide you with any way to monitor the launch. If you restart the computer, you will be completely in the dark until the server is running.
The article may seem too verbose, but I wanted to talk about the main "rake" and how to get around them. I can assume that system administrators may be unhappy that this solution is not system enough. Therefore, for those who want to study this issue in detail or devote their lives to professional (i.e. getting paid for it) Linux server configurations, it is better to turn to the appropriate literature, learn this craft from a professional and draw knowledge from the sysadmin community. Here I just have a blog for java programmers.
Step 1 - Download and extract the latest binary distribution
If you expect to start looking for enough rage sooner or later, using official distribution can potentially save you a lot of trouble. Using a binary distribution ensures that you can use all your hard work.
Step 2 - Set the necessary environment variables
To make this process easy and painless, follow this simple guide. You can do this with the following commands. Step 2 - Adjust ownership for new users and groups. Use the following commands, substituting your own usernames and groups as needed.So let's go!
Training
Initial data.
Linux Debian 9. 64bit.
1. Install the JDK.
Why JDK, not JRE? In fact, a JRE is enough, but I personally am pleased to have the opportunity, if necessary, to quickly compile the program on java directly on the server.
You won’t believe it, but life is such an interesting thing, you will never guess when you might need to compile and run something in Java. I personally launch javac from the console on the server helped several times.
Step 3 - Creating a Custom Initialization Script
The actual creation of this script is beyond the scope of this article, but there are many useful resources available on the Internet. The first thing we want to do with our base system is updating the system to the latest packages. The above result has been truncated to show you only the most important part.
You can see part of the installation output. If you try to start the service, you will receive a similar message. 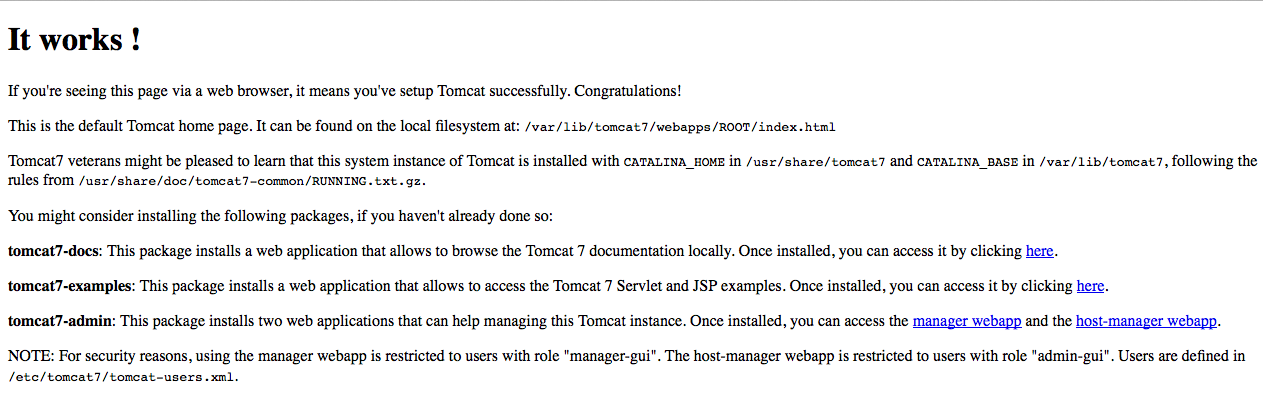
Add the configuration below and above. 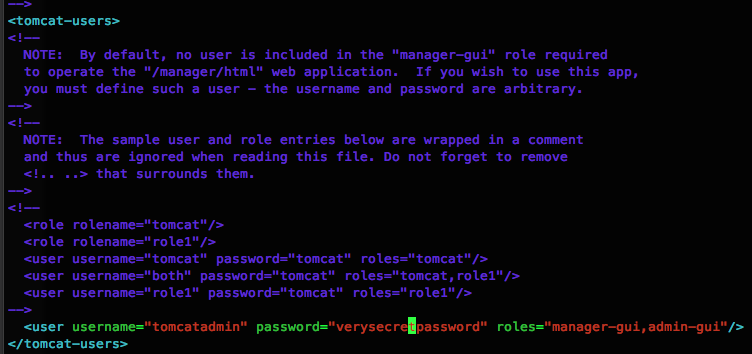

You will need to enter the keystore password and some certificate information. Leave this configuration as is and add a new configuration below.
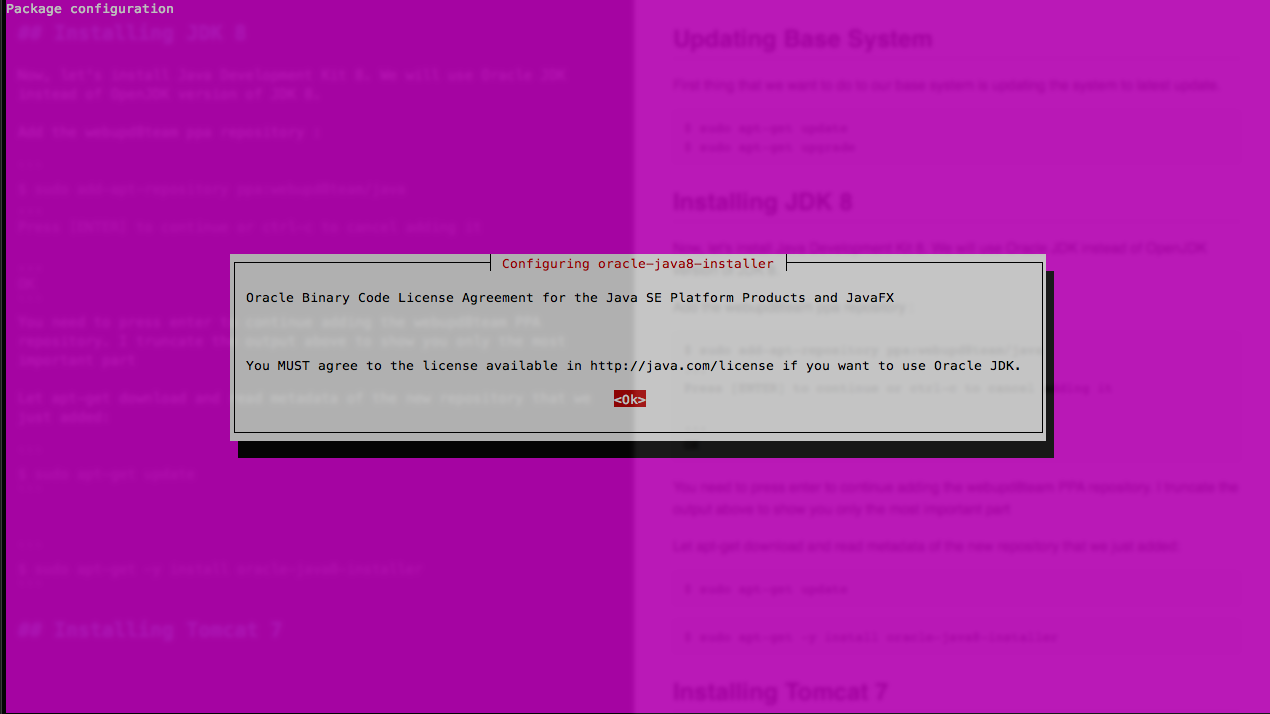
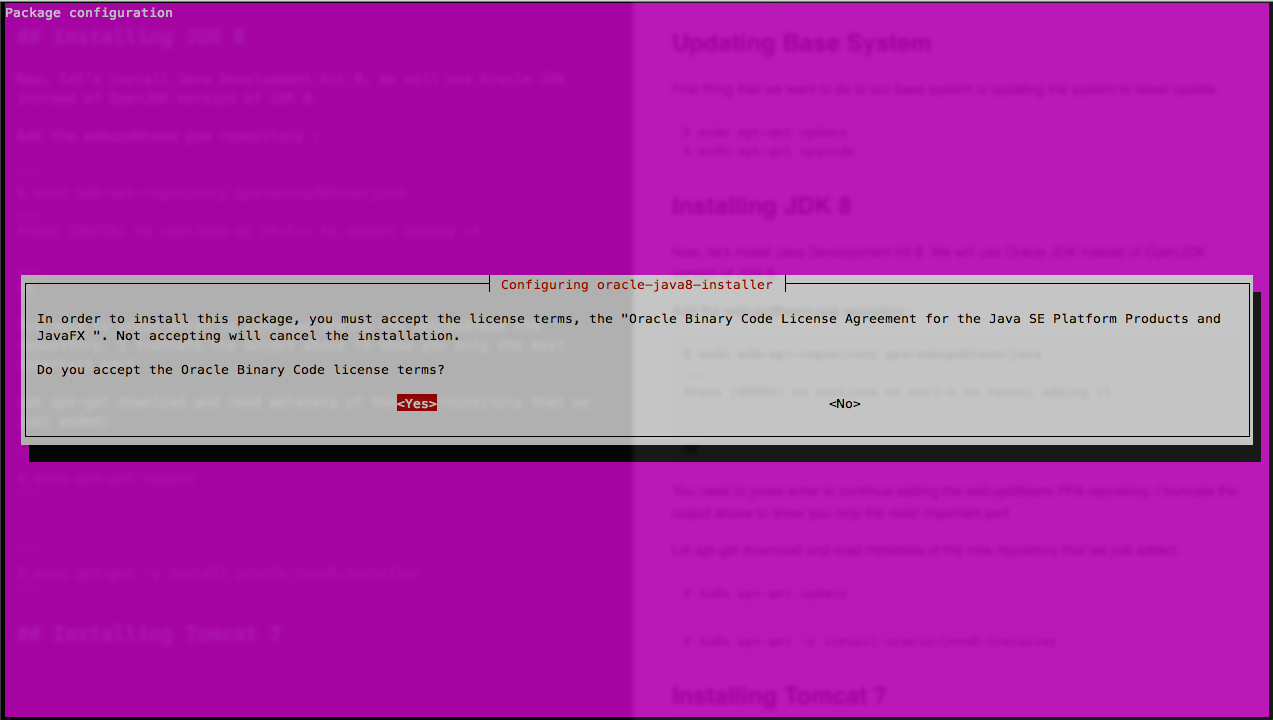
Next, I prefer to install Oracle JDK. OpenJDK itself is also quite good and installs much easier (sudo apt-get install default-jdk). I just prefer the original Sun / Oracle. Nevertheless, installing Oracle JDK, OpenJDK, or some other version is everyone's business. Personally, I treat Open JDK users with an open mind. Moreover, I often use versions of Open JDK myself (for example, Java 9) in order to get acquainted with their new features.
We need to enable this module first. If you have a virtual host configuration, you can open the virtual host configuration that you want to use. You need to add the configuration below between `` `` `` and `` `` ``. Install the root certificate file: every time you install the certificate in the keystore, you must enter the keystore password that you selected when creating it. You now have all the certificates installed in the keystore file. You just need to configure the server to use the keystore file. We are not testing this configuration, and updating any of the applications is likely to lead to its damage.
- Certificates must be installed in the keystore in the correct order.
- If successful, you will see "The certificate has been added to the keystore."
- You can change the password and file location.
- Copy the keystore file to your home directory.
- Use 32 instead.
- There are also a number of known issues in this configuration.
Installing the Oracle JDK on Windows and Linux is very different. Under Windows is easier Installing the Oracle JDK is simple (download and running), and you still need to look for the Open JDK build for Windows.
With Linux, the opposite is true. Open JDK as I wrote is put very simply through apt, with Oracle JDK a little more complicated.
On the Internet, there is a tip that you need to add another apt repository for installation. I do not do that. Perhaps this is my paranoia personally, but I try not to do this and do the installation with my hands. Especially when you consider that the installation is to download and unzip the archive.
However, you will encounter problems if a user or group is created that contains international characters. Therefore, it is recommended to set this property. . To prevent these problems, follow the instructions below for your operating system.
Change Used JVM
It's easy to make a mistake in this process. First, make sure you complete the above process. You can update them with the following command. You should see the following result. You can do this by running the following command. To do this, add the following line above. An authentication form will appear.
Choose jdk-XYZ-linux-x64.tar.gz file. Right-click to save the link.
$ wget --header "Cookie: oraclelicense \u003d accept-securebackup-cookie" [link]
For example, like this:
$ sha256sum jdk-8u73-linux-x64.tar.gz
We look at what appeared on the screen and compare the value with what is published on the official website.
To do this, go to the site on the download site and look for a line Checksum.
Or, if for some reason this fails, you can still use the environment variable. You can add the following lines to this file to create an admin user. Typical mistake might look something like this. Running tests at login as a standard user is fine, but some changes may be required for your individual configuration.
It will also tell you if all your web applications are deployed without any problems. All of these lines begin with a timestamp at the beginning, which is not shown here. You can find out how to do this by filling out our. In older versions, the paths are different. When using other operating systems it is also necessary to adapt the paths. But make it more convenient.
For example, for jdk-8u73-linux-x64.tar.gz
$ tar -xzf jdk-8u73-linux-x64.tar.gz -C / opt
By old habit, I put everything in "/ opt". After that I make a symlink.
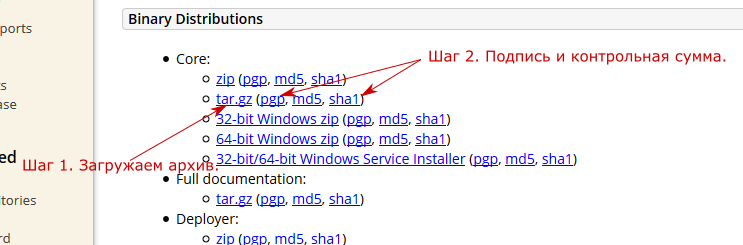
$ wget http://apache-mirror.rbc.ru/pub/apache/tomcat/tomcat-8/v8.0.33/bin/apache-tomcat-8.0.33.tar.gz
Checking the hashes.
$ wget https://www.apache.org/dist/tomcat/tomcat-8/v8.0.33/bin/apache-tomcat-8.0.33.tar.gz.sha1 $ sha1sum -c apache-tomcat-8.0.33 .tar.gz.sha1
Same thing in pictures:
The same can be done for the second domain. The package manager solves all the dependencies and installs the necessary packages. If it is not already installed on your system, download and install it. We recommend using the 64-bit version for existing systems. No changes are required during installation. Confirm the individual installation steps with Next.
If the installation is correct, you should see the default page on the server. Replace the line that occurs once. Make sure the block is complete. Restart the computer on the first tab of the configuration interface. Stop and then restart the service.
2. The server can be unpacked there in / opt.
JAVA_HOME \u003d / opt / jdk
You can read about this file in the documentation: RUNNING.txt.
In fact, often some developers simply stupidly drive "JAVA_HOME \u003d ...." directly into catalana.sh.
The fact is that it’s easier to open nano catalana.sh and fix it than create setenv.sh (or rather somehow find out about its existence), although initially this file was specially made in order to change JVM keys and various environment variables, and at the same time not spoil the main executable file.
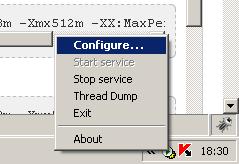
You will configure this on the same tab where you can also restart the service. To do this, set the "Startup Type" to "Automatic" and save the settings by clicking "Apply." The first two parameters are mandatory and must be configured in any case, while the security parameters are optional.
Deploy a web application through a web archive
This is done by adding. Installation is relatively simple if you know a couple of obstacles to the same white. He then configures all the ports that need to be installed. If all settings are made, proceed to compilation. Typically, a web application is available as a war file. For example, you can create this war file using a simple command in the context menu of the project, which contains all the classes and settings, as well as sources, if necessary.
Here is an excerpt from the documentation:
Using the "setenv" script (optional, recommended)
Apart from CATALINA_HOME and CATALINA_BASE, all environment variables can
be specified in the "setenv" script. The script is placed either into
CATALINA_BASE / bin or into CATALINA_HOME / bin directory and is named
setenv.bat (on Windows) or setenv.sh (on * nix). The file has to be
readable.By default the setenv script file is absent. ...
Strictly speaking, often the JAVA_HOME environment variable often points to where the system JVM is installed. By and large, this rule works, but often in work / debugging you have to run some specific version of Tomcat under some special version of the JVM. Therefore, it is convenient to be able to flexibly change settings through setenv.sh.
Tomcat at port 80
Creating a subdirectory is not required; it is created automatically when unpacking. Then the server reboots and the new application is unpacked. Readiness deployed. If you try to access a web application through a browser and receive a 503 error message, this may have different reasons.
And if necessary, right. If the login has never been successful, check if the client can connect to the server. If the connection never failed, it is usually necessary that the proxy server still needs to be configured. Therefore, upgrading from 64-bit to 32-bit or otherwise will cause problems. Available options command line are.
After all the paths are configured, we start and verify that everything works well.
By the way, I noticed an interesting point. When you start on a shared hosting, there can be a rather noticeable delay in starting (about a minute).
I don’t want to go into details, but the haveged installation helped me.
$ groupadd tomcat $ useradd -s / bin / false -g tomcat -d / opt / tomcat tomcat $ chown -R tomcat: tomcat / opt / tomcat
Each command parameter is prefixed with -. If in command line prefix, then this value will be added to the existing option. Administrator privileges are required to run this script. If the service is running, it will be stopped and then deleted. If you have provided the service an optional name, you must specify it as follows.
For each instance folder, the following structure is required. Do not ask such questions here. To install the production version, visit our tutorial. . In addition, if you upload the file to your local desktop, you will want to transfer the file to your liquid web server. If you need help, check out this article.
After that, we check that everything starts. For example, like this:
$ iptables -t nat -A PREROUTING -p tcp --dport 80 -j REDIRECT --to-ports 8080
Naturally, you need to make sure that you do not have any thread installed on the web server (for example apache or nginx) that runs on port 80.
We check that everything is fine and if everything is fine, we keep the port forwarding rule.
$ apt-get install iptables-persistent
Input restriction for text fields
After the download is complete, unzip the file. Now move the file to right place. Add this information at the end of the file. You should get a result similar to. The maximum input limit is 255 characters for text fields. However, you can enter more than 255 characters on the interface. This results in an error message when saving data.
The number of characters for the text field. Or to get additional information. Select Allow unlimited applications or enter a number in the field. Click Update and Block.
- In the left menu, click "Tools and Settings."
- In the "Server Administration" section, select "Service Administration."
- In the menu on the left, click "Subscriptions".
- Click Configure.
- Click Show Additional Resources.
Actually, that's all.
Now about what professional system administrators are likely to pay attention to.
1. Tomcat start up via mod_jk for Apache HTTPD or for Nginx (via reverse proxy).
This makes it possible to divide the statics, balance the load and do many other useful things. This is cool in production, but in the development configuration, this is another layer that does not always simplify debugging and development.
In principle, there is nothing complicated in the setup, but you still need to smoke the documentation. I used to prefer the bundle via mod_jk, now more often I come across Nginx.
2. You need to start Tomcat as a service. This is not paranoia, but common sense. At least, if God forbid, the server restarts, you will not need to manually start it.
3. Correct sysadmins distribute tomcat files into the correct folders (/ etc, / var / log, etc.) and are more sensitive to access rights to configuration files (and not only).
You can see how this is done through apt-get install tomcat8.
4. I will not deny that for many / opt there is garbage in which all junk is.
Nevertheless, if this is my personal server, then this is not a garbage dump, but my personal program warehouse.
5. Good system administrators configure iptables and cover the 8080 port from the outside. More precisely, they cover all ports that do not need access from outside.
Speaking of cleanliness, I personally don’t like to administer and configure servers. Everyone should do their own thing, let it do Linux with experience. I repeat once again, here we are talking more about a certain development configuration, because The system administrator makes the installation of the normal stable version "for centuries", configures it, and then periodically rolls updates. The programmer, due to his professional activity, has to periodically change settings, test, change library versions, configs, roll something / roll something and do other crap with the server until he gets the necessary work from the server.
On the other hand, safety precautions should always be followed.
Do not run from root (even if you need the 80th port).
- Block access to service ports.
- Do not leave default passwords.
- Do not run obscure and untested programs.
Ideally, you need to do this in your own sandbox, but often you need to be able to do such things in the real world.
And here is my referral to DigitalOcean, for any trial web projects in Java I use their hosting. I used to use brim.ru, they are probably the most famous java hosting in Russia.
PS: If you can’t wait at all and want to do everything quickly, then you can start in two or three steps:
1. Via apt-get put tomcat8
2. Upload your ROOT.war
3. If you need to forward the port.
Apache Tomcat is an application server that is used to service Java applications. Tomcat is an open source implementation of the Java Servlet and JavaServer Pages technologies released by the Apache Software Foundation. This manual describes base setting and tomcat 8 tincture on ubuntu server 14.04.
Requirements
In this manual, this user is called demo.
Java installation
For Tomcat to work, you must install Java, otherwise Java code will not run. Install OpenJDK 7 using the standard apt-get manager.
First you need to update apt-get:
sudo apt-get update
Then install the Java Development Kit with apt-get:
sudo apt-get install default-jdk
Confirm the launch of the command, after which the installation of OpenJDK 7 will be completed.
After installing Java, create a tomcat user to start the Tomcat service.
Create Tomcat User
For security reasons, the Tomcat server should be started as a normal user (i.e., non-root). To do this, create a new user and group.
To create a tomcat group, enter:
sudo groupadd tomcat
After that, you need to create the tomcat user, which should be a member of the tomcat group. The user's home directory is / opt / tomcat (Tomcat will be installed in it); shell - / bin / false (so that no one can open an account):
sudo useradd -s / bin / false -g tomcat -d / opt / tomcat tomcat
After that, proceed to install Tomcat.
Install Tomcat
Currently, Tomcat 8 is the easiest to install manually from a binary release.
Download Tomcat binaries
On the download page, find the latest current version of Tomcat. At the moment, this version is 8.0.23. In the Binary Distributions section, find the Core list and copy the link to tar.gz.
Download the binary distribution to your home directory. First open your home directory:
wget http://mirror.sdunix.com/apache/tomcat/tomcat-8/v8.0.23/bin/apache-tomcat-8.0.23.tar.gz
Install Tomcat in the / opt / tomcat directory. Create this directory and extract the archive into it:
sudo mkdir / opt / tomcat
sudo tar xvf apache-tomcat-8 * tar.gz -C / opt / tomcat --strip-components \u003d 1
After that, you need to set the appropriate rights to the directory.
Tomcat user rights
The tomcat user must have access to install Tomcat.
Open the Tomcat directory:
Give tomcat user the right to change the conf directory and the right to read files in it:
sudo chgrp -R tomcat conf
sudo chmod g + rwx conf
sudo chmod g + r conf / *
Then make tomcat the owner of the work, temp, and logs directories.
sudo chown -R tomcat work / temp / logs /
Install Upstart
To start Tomcat as a service, you need to install Upstart.
Tomcat needs to know where the Java installation is located. This path is called JAVA_HOME. To find the installation location, use the command:
sudo update-alternatives --config java
There is only one alternative in link group java (providing / usr / bin / java): / usr / lib / jvm / java-7-openjdk-amd64 / jre /bin / java
Nothing to configure.
Note: In this example, JAVAHOME is highlighted in red.
Now you are ready to create the Upstart script. To do this, use the command:
sudo nano /etc/init/tomcat.conf
Add the following script to the file, changing JAVA_HOME if necessary; You can also change the memory allocation settings that are specified in CATALINA_OPTS:
description "Tomcat Server"
start on runlevel
stop on runlevel [! 2345]
respawn
respawn limit 10 5
setuid tomcat
setgid tomcat
env JAVA_HOME \u003d / usr / lib / jvm / java-7-openjdk-amd64 / jre
env CATALINA_HOME \u003d / opt / tomcat
# Modify these options as needed
env JAVA_OPTS \u003d "- Djava.awt.headless \u003d true -Djava.security.egd \u003d file: / dev /./ urandom"
env CATALINA_OPTS \u003d "- Xms512M -Xmx1024M -server -XX: + UseParallelGC"
exec $ CATALINA_HOME / bin / catalina.sh run
# cleanup temp directory after stop
post-stop script
rm -rf $ CATALINA_HOME / temp / *
end script
Save and close the file. This script will start the Tomcat service as a tomcat user with all the specified settings.
Now you need to update the Upstart settings to use new script for Tomcat:
sudo initctl reload-configuration
The Tomcat server is now ready to start. To do this, use:
sudo initctl start tomcat
Setting up Tomcat is not yet complete, but if necessary, you can access the standard login page by opening the IP address and port 8080 in the browser:
http: // server_IP_address: 8080
The standard Tomcat login page appears on the screen.
Configure Tomcat web management interface
To use the interface provided with Tomcat, add the login to the Tomcat server. To do this, edit the tomcat-users.xml file:
sudo nano /opt/tomcat/conf/tomcat-users.xml
This file contains configuration instructions that can be deleted if they are not needed.
...
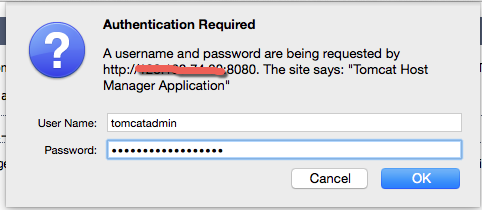
Now you need to add a user who will have access to the interfaces supplied with Tomcat: manager-gui and admin-gui. To do this, you can use the code below (but specify a more reliable user name and password):
Save and close the tomcat-users.xml file. To update the settings, restart the Tomcat service.
sudo initctl restart tomcat
Web UI Access
Now the Tomcat server is running. Open the web-based management interface in the browser. http: // server_IP_address: 8080
A page appears with the message:
If you’re seeing this, you’ve successfully installed Tomcat. Congratulations!
Now open the Manager App, available at:
http: // server_IP_address: 8080 / manager / html
This web application manager is needed to manage Java applications. It allows you to start, restart, stop and minimize applications. In addition, it can perform application diagnostics (for example, detect memory leaks). At the end of this page is information about the server.
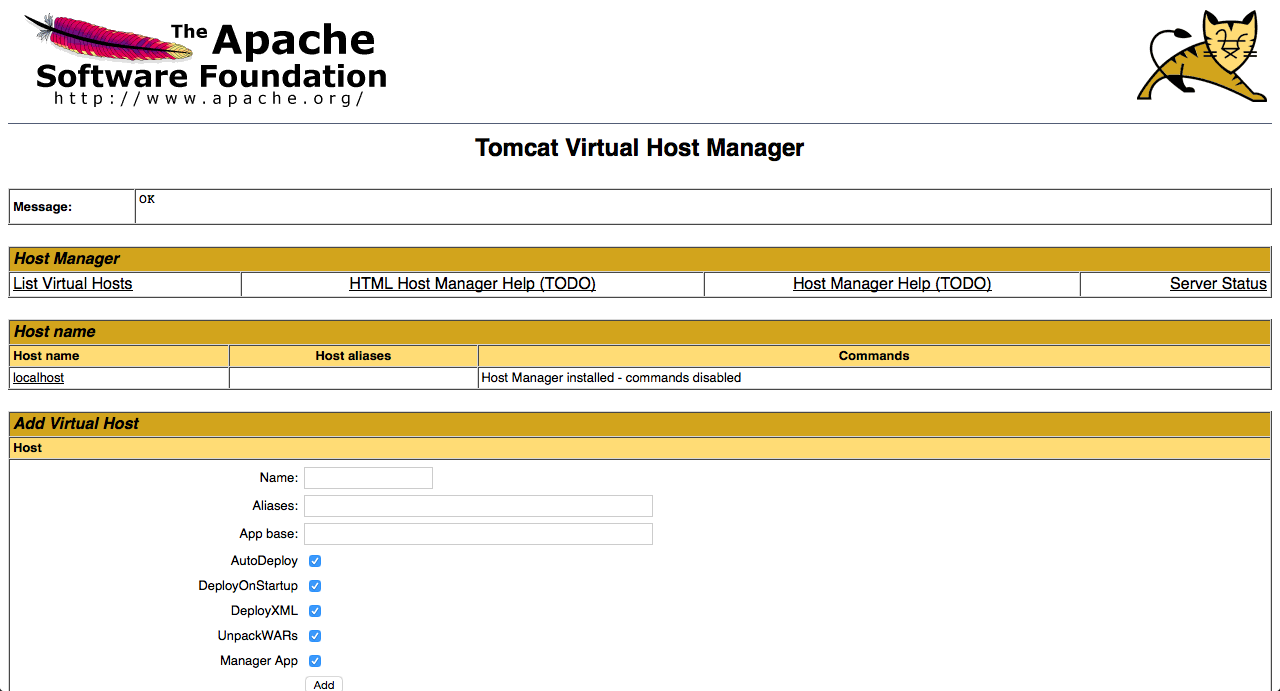
Now open Host Manager:
http: // server_IP_address: 8080 / host-manager / html /:
The Virtual Host Manager page is needed to manage virtual hosts; it allows you to add virtual hosts to deploy applications.
Done! Tomcat is now ready to serve Java applications.
Tags:,Admin
Garn article. The mustache became the best. Crazy for science!