Developer console google play login. Why block the developers of Google Play. List item properties
Hello to everyone who wants to create games.
In this article I will tell you what awaits you in the console Google play Developer.
If you decide to become a developer of games for Android, then prepare 25 bucks and let's add the game to Google Play market.
Developer Account
First of all, you need to create a developer account. Google recommends creating a separate account specifically for the Google Play developer.
Log in to Google and follow the link https://play.google.com/apps/publish/signup/.
This tool allows developers to track and fix any current problems in order to improve user experience. This tool is mainly designed to understand stability, battery usage, and rendering time. The release management tool has several new features that help developers understand the key metrics associated with the release of their application.
It also allows users to test the application without having to install their device on the home screen. This tool shows the number of installations, rating and revenue contributed by each device. Acquisition reports can help developers understand where users are coming from, and if they continue to install and buy content in the app. The report also contains data on saved installers, which are further divided into data for specific channels and geographical regions, which are provided by valuable users who have supported the application for more than 30 days.
Here you need to agree to the rules of Google Play, enter credit card details and pay $ 25 for the year of ownership of the developer account.
Developer Name
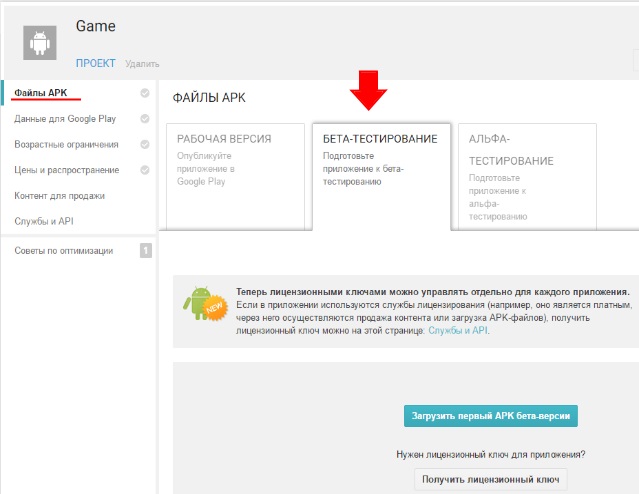
Download game
So, you are in the developer account!
Attention! The design of the Google Play Developer dashboard has been redesigned.
The screenshots in this article were taken on an old design.Monitoring the effectiveness of their subscription allows developers to make any necessary business decisions to improve revenue growth. Developers can also analyze the total number of subscribers, revenue and retention in different dimensions. The license key prevents the unauthorized distribution of your application, and is also used to verify the purchase of billing in the application. Single-release applications that are standalone and contain embedded content. They do not offer a store function for buying or downloading additional content. Applications with several problems that contain the ability to offer additional pieces of content or subscription to content. Note.
Before you upload an APK file to Google Play, you need to sign your application as described in this article.
Do not delete the signature file from your computer. You will need it when you download new versions of your application.
And still need to change the standard package name com.yourcompany.yourapplication
on. [developer name]. [application name]
Keywords in description
Information in the list of stores should not be completed at the moment. You can return later to fill out this information before publishing your application. Since then, we have tested it with tens of thousands of developers, analyzing their reviews and adjustments.
Smooth, faster, easier to navigate
Track user ratings over time and find ways to improve
Additional languages \u200b\u200bfor lists with automatic translation. How can you try new version. Thanks for all the feedback.- Browse the extension files.
- This is not displayed publicly.

And indicate the version of your application.
![]()
When you release an update to your game and download a new APK file, you will need to change the version of the application. You will not be able to download the application with the same version number (the application version is displayed on Google Play).
Frequently asked Questions
If the application is downloaded and not published, it will remain in the project. After the publication of the application, it will begin to show to users around the world within a few hours. You can easily change the price, change its distribution parameters, without programming knowledge. When you add additional features to your application, you can easily update it through the developer console. After making such changes, users using your application will be notified automatically.
After that, you can add the APK file. Click on the button
![]()
Top right
Enter the name of the application and click on the button Download APK.

Then, if you want, you can change the name of the application.
In this way, they can get information about your application in real time, and they will update it accordingly. There is another opportunity to publish your application. If you find any problems with current versionYou can easily take it off. This block loads your application.
Not only for the hardware, but also for the software field. New applications, games, music, movies, etc. begin to be released in the play store. Then the next opportunity to get a credit card is to provide a bank guarantee. But this requires a huge deposit to accept credit cards in India.
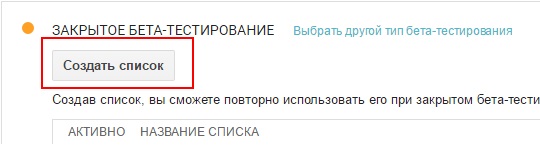
At closed beta testing your app on the Play Market is showing only to you, and those people whose accounts you specify as testers. You can specify up to 1000 beta participants.
Push button “Download First Beta APK File” and select the file on your computer.
It will also be a difficult choice for people under 25 years old. I have personal experience in this case. But it displays the message "Your credit card declined." The error message. But usually your debit card will not work. When you add your regular debit card, the message “Your credit card declined” is also displayed.
You just need to go a few steps. After making the payment, the user must fill out the registration form with his personal information.
- You can use an existing one or create one.
- Which is more appropriate?
- Well, it depends on the use that the already created account gives.
- Fill out the registration form.
The maximum APK file size is 100 MB. Although if your Android application 2.2 and earlier versions, then you can download the application weighing only 50 MB.
Here you can create a list of testers who will have access to your beta application.
Know Control Center
However, before starting this step, you must create the application yourself. What you can get with the same user and password with which you get access to other services of this platform. 
- This is just a one-time payment of $ 25.
- Include your account.
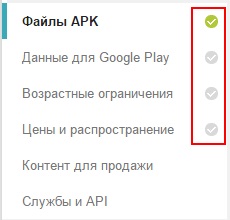
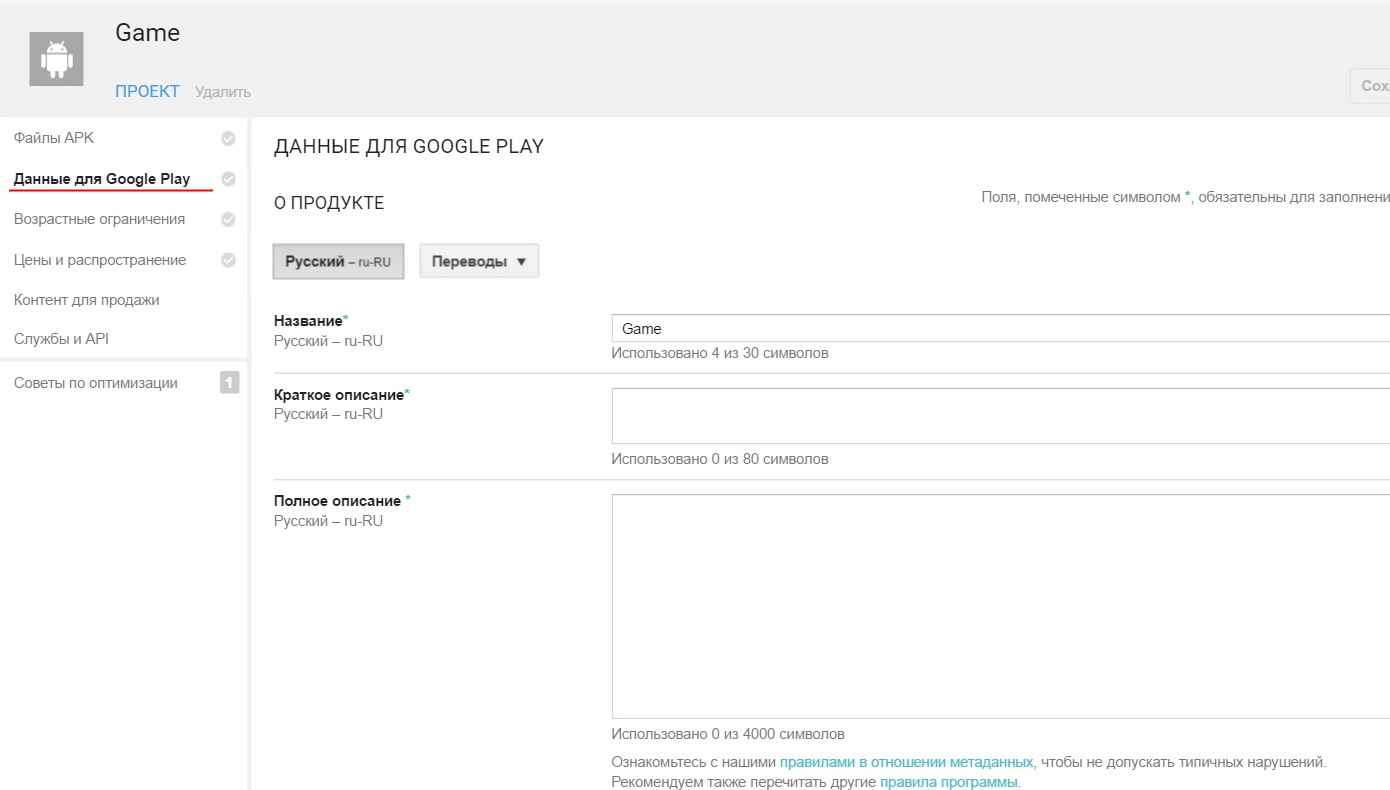
Everything is pretty simple here. You need to fill out a description of the application. There are some rules about what this description should be.
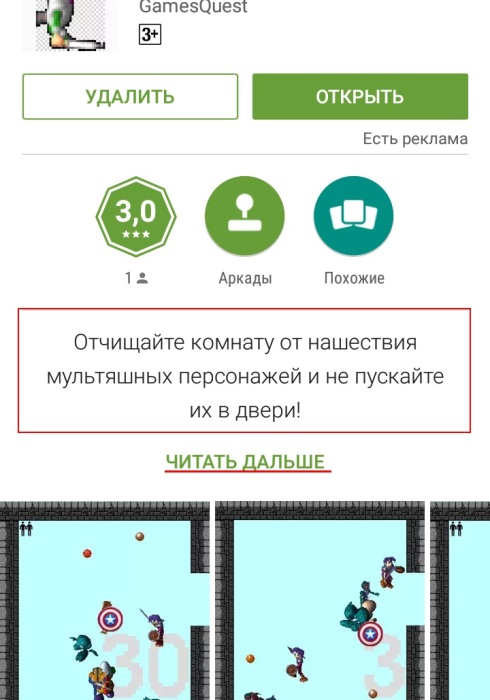
Short description you see on the application page:
Add new application
One of the keys to a good headline is to try to make it as short and concise as possible. This step is important because it allows you two options: Beta test your application with specific groups.
- Select the "Add a new application" option in the "Your Applications" menu.
- Select the default language from the drop-down menu.
- You must add a name for the application later.
You also need to fill in the application icon and screenshots.
Fill in everything you need. And don't forget to upload images on all tabs:
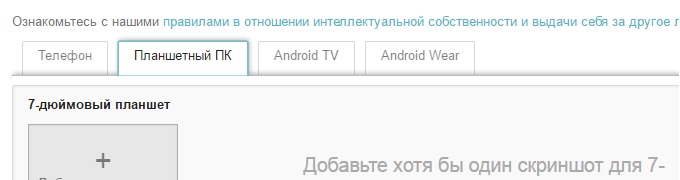
![]()
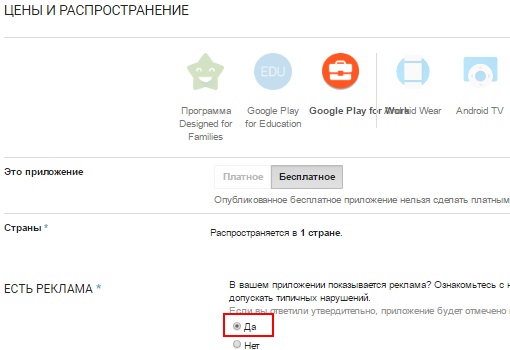
Set Price and Distribution
For your application to be successful, you need to take care of this stage. Here are some of the most interesting tips to help make your application list effective. You should try to make the icon of your application understandable, creative, original, innovative and powerful. Also make sure that it does not look like an icon for other applications. Only then can you stand out and be unique. Includes screenshots that tell something. Try to get an attractive aesthetic, and this matches the profile of the user you want to conquer.
- Insert interesting keywords.
- Choose in good faith which keywords you will use.
- They will become the basis for optimizing your application.
- Create the appropriate icon.
Go to the next page.
It's still simpler here. You need to enter your email address and select an application category.
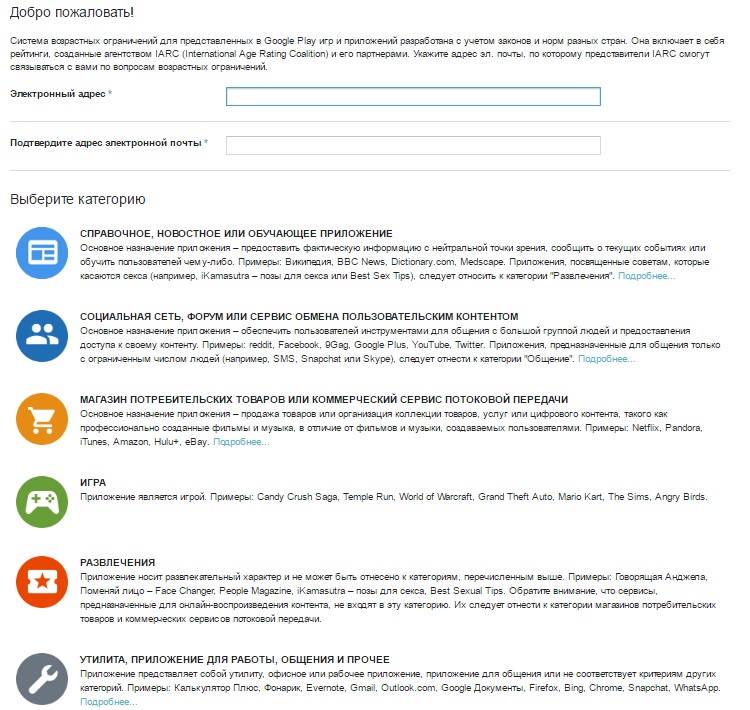
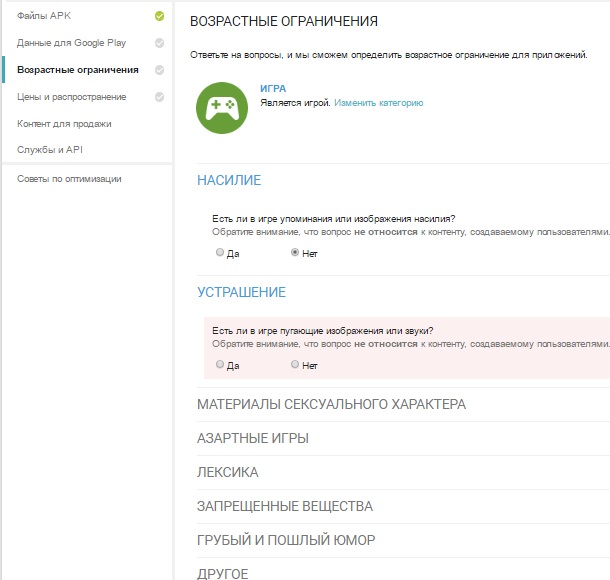
And then answer the simple questions about your game.
In addition, it's time to choose whether you want your application to be free or paid. These accounts are obtained through an independent agreement with the Payment Processor. Finally, you just need to change the status of the project. As you can see, this is a simple process. But, nevertheless, you should not follow him, as he tells you the details that you should pay special attention to.
Why create an app for your company?
More and more users are connecting to the Internet through their mobile devices. This makes it possible to reach and attract more users. Applications left connections through mobile browser in the background. If the user is really interested in the brand, their application will be downloaded. Moreover, he knows that this will have constant and direct access to all the content that the brand offers.
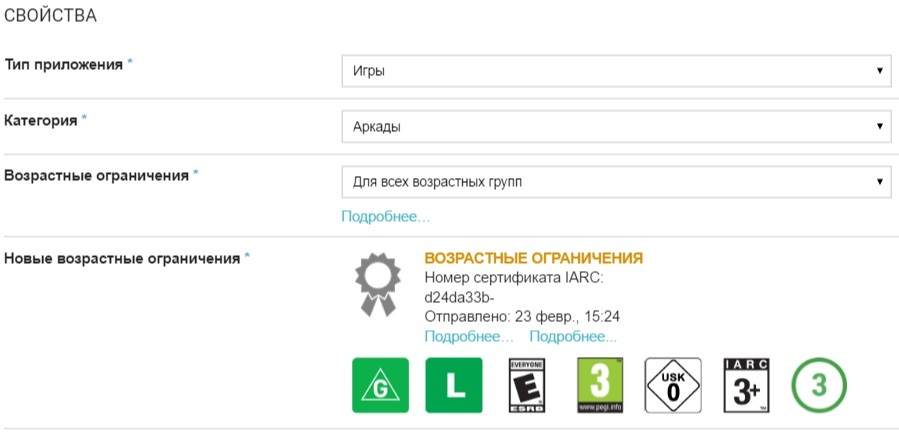
And she will be assigned an appropriate age rating, like this:
Last Point - Pricing and Distribution
Here you must determine whether your application will be paid or free.
A paid application can be made free. But a free application cannot be paid. To receive income from the sale of the application, you will need to publish it with a new package name (com.yourcompany.yourapplication), and then indicate the price.
Using Play Console
In addition, users are looking for convenience and an attractive user interface in a mobile environment. Something they get through apps. People require services and tools that facilitate their work or entertain them from a mobile device. To do this, they are looking for tools that they can use daily, from anywhere and at all times.
Benefits of creating an app for your brand
Therefore, they offer a quick and much more instinctive service than other platforms. In fact, they usually do not present much difficulty in finding easily the various functionalities that they offer. It does not require the abandonment of services or functionality, as well as the adaptation of the website to mobile navigation. Applications are generally highly compatible. This avoids the problems that may arise when adapting content to various operating systems. In this way, applications can intuitively and efficiently incorporate all the functionality you want to provide to your users. You offer your services 24 hours a day. This is a communication channel that is customizable and helps maintain user loyalty.
However, the successful application of your application requires that, in addition to optimizing the shape of your application, other aspects, such as, be taken into account.
- It is a convenient, easy to use and fast system.
- After all, applications are a small virtual world of companies.
- In addition, applications are usually easy to operate.
If you plan to show ads Admob or Chartboost in your game, be sure to check this in the settings, otherwise the advertisement will not work.
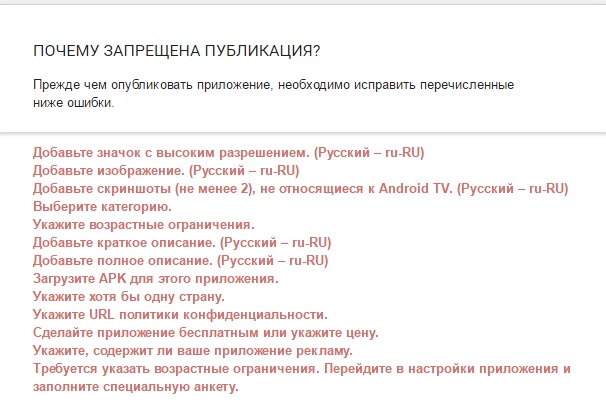
Caution! Google Play Guidelines
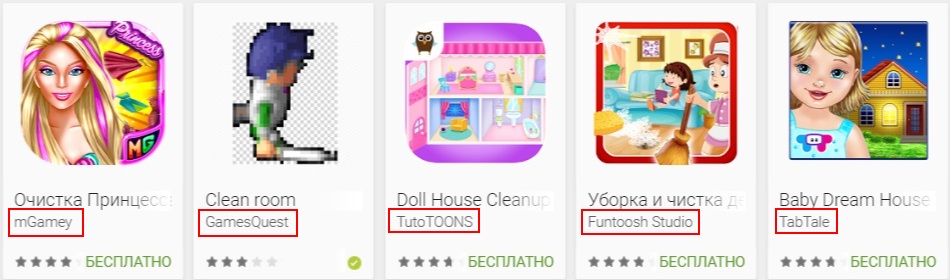
Do not try to publish games with graphics from other games that you downloaded on the Internet. This is fraught with blocking the developer account. But the good news is that you can use the graphics from the standard Clickteam Fusion 2.5 libraries! Games with objects from Clickteam Fusion 2.5 are moderated on Google Play without any problems.
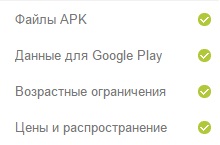
Section "Data for Google Play"
This activity will not only help you optimize the positioning of your application, but also allow you to reach a wider audience. Interestingly, you are working on creating exclusive elements that can only be enjoyed by the application installed on mobile device. To do this, you should look for blogs that report on applications on the market and ask them to talk specifically about your application. Updated. This is one of the significant factors. An application that does not innovate or does not contain anything new will be difficult to succeed.
- Track the presence of your application on opinion websites.
- Offer compelling reasons to share your app.
- Publish content on specialized blogs.
Done!
When you complete all the points,
In general, everything is quite simple. The administration panel itself gives clear hints if you miss something. You just need to click on the link and you will see something like this:
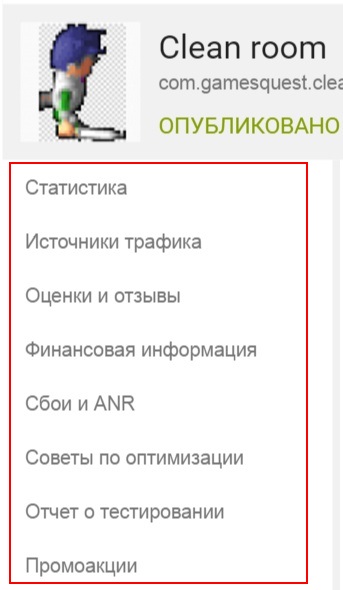
That's all. I hope you enjoyed it. I wish you success in developing games and a million downloads
Hello to everyone who wants to create games. In this article I will tell you what awaits you in the Google Play Developer console. If you decide to become a developer of games for Android, then prepare 25 bucks and let's add the game to the Google Play Market. Developer Account First of all, you need to create a developer account. Google recommends creating a separate account specifically for the Google Play developer. Log in to Google and follow the link https://play.google.com/apps/publish/signup/. Here you need to agree to the rules of Google Play, enter credit card details and pay $ 25 for the year of ownership of the developer account. Next, you will need to fill out the developer profile information. Developer name will be displayed ...
How to add games to Google Play
How to turn the developer console Google chrome like a text editor? What is the meaning of the familiar icon in jQuery $ ? How to output to the console a set of values, designed in the form of a very decent table? If the answers to these questions do not immediately come to mind, then the tab Console Chrome’s developer tools haven’t yet been revealed to you in all its glory.
At first glance, we have before us a completely normal JavaScript console, which is only suitable for displaying server response logs or variable values \u200b\u200bin it. Incidentally, I used it the way I just started programming. However, over time I gained experience, learned a lot, and unexpectedly found myself that the Chrome console knows a lot of things, which I never knew about. I want to talk about this today. Yes, if you are reading now not on a mobile phone, you can immediately try all this.
1. Choosing DOM Elements
If you are familiar with jQuery, it’s not for me to tell you about the importance of constructs like $ (‘. Class’) and $ (‘Id’). For those who are not in the know, I’ll explain that they allow you to select DOM elements, indicating the classes and identifiers assigned to them. The developer console has similar functionality. Here, "$", however, has nothing to do with jQuery, although it does essentially the same thing. This is an alias for the function. document.querySelector ().View Commands $ (‘TagName’), $ (‘. Class’), $ (‘# Id’) and $ (‘. Class #id’) return the first DOM element matching the selector. At the same time, if jQuery is available in the document, its "$" will block this console functionality.
There is another design here: $$ . Its use looks like $$ (‘tagName’) or $$ (‘. Class’). It allows you to select all the DOM elements corresponding to the selector and place them in an array. Working with it is no different from other arrays. In order to select a specific item, you can refer to it by index.
For example, the command $$ (‘. ClassName’) will provide us with an array of all page elements with the class name specified when it is called. Teams $$ (‘. ClassName’) and $$ (‘. ClassName’)? will give access, respectively, to the first and second element of the resulting array.
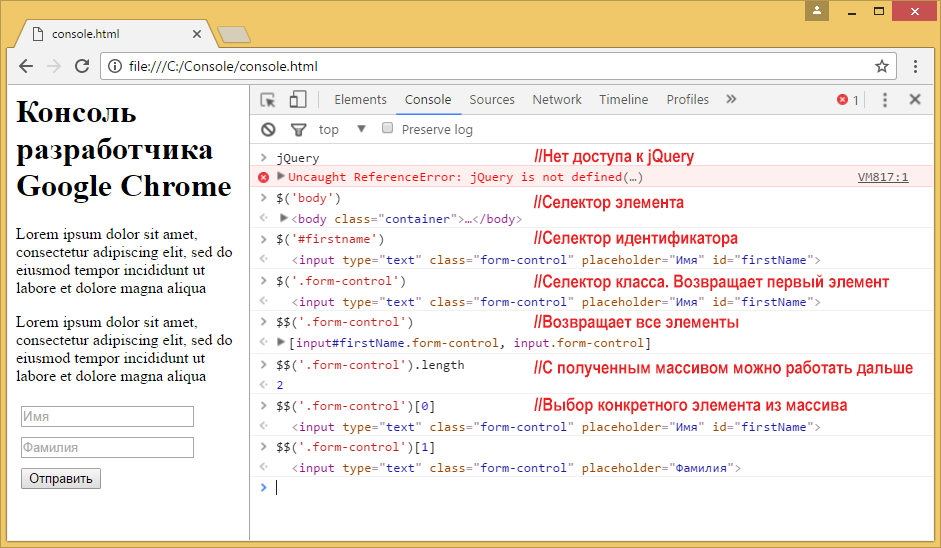
Team Experiments $
and $$
2. Turn the browser into a text editor
Have you ever found yourself thinking that it would be nice to edit the text of a debugged web page right in your browser? If so, then you will like the command shown below.Document.body.contentEditable \u003d true
After its execution in the console, the document opened in the browser can be edited without the need to search for the desired fragment in the HTML code.
3. Search for event handlers associated with an element
During the debugging process, you may need to find event handlers that are bound to elements. Using the console, this is very simple. It is enough to use the following command:GetEventListeners ($ (‘selector’))
As a result of its execution, an array of objects containing a list of events to which the element can respond will be issued.
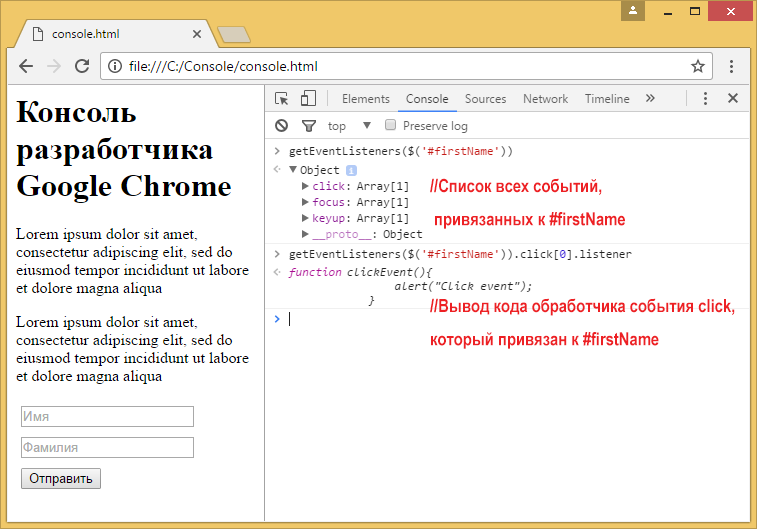
Event handlers
In order to find a handler for a specific event, you can use the following construction:
GetEventListeners ($ (‘selector’)). EventName.listener
This command will output the code of the event handler function. Here eventName Is an array that contains all the events of a particular type. For example, in practice, it might look like this:
GetEventListeners ($ (‘# firstName’)). Click.listener
As a result, we get the code of the function associated with the event click item with id firstName.
4. Event monitoring
If you want to observe the occurrence of events associated with a specific DOM element, the console will help with this. Here are some commands you can use to monitor events.- Command monitorEvents ($ (‘selector’)) allows you to organize monitoring of all events associated with the element to which the selector corresponds. When an event occurs, a recording is made in the console. For example, the command monitorEvents ($ (‘# firstName’)) will allow logging all events associated with an element whose identifier is firstName.
- Command monitorEvents ($ (‘selector’), ’eventName’) similar to the previous one, but it is aimed at a specific event. Here, in addition to the element selector, the name of the event is also passed to the function. This command allows you to display information about the occurrence of one event in the console. For example, the command monitorEvents ($ (‘# firstName’), ’click’) will display information only by event click item with id firstName.
- Command monitorEvents ($ (‘selector’), [‘eventName1’, ’eventName3", ....]) Allows you to monitor multiple selected events. Here, a string array that contains the names of the events is passed to the function. For example, a command like this: monitorEvents ($ (‘# firstName’), [‘click’, ’focus’]) will output event information to the console click and focus for item with id firstName.
- Command unmonitorEvents ($ (‘selector’)) allows you to stop monitoring and logging events in the console.
5. Measuring the execution time of a code snippet
In the Chrome console, a view function is available console.time (‘labelName’), which takes a label as an argument and starts a timer. Another function console.timeEnd (‘labelName’), stops the timer to which the tag assigned to it is assigned. Here is an example of using these functions:Console.time ("myTime"); // Starts a timer labeled myTime console.timeEnd ("myTime"); // Stops the timer labeled myTime // Output: myTime: 123.00 ms
The above example allows you to find out the time between starting and stopping the timer. You can do the same thing inside a JavaScript program and find the runtime of a piece of code.
Let's say I need to find out the duration of a loop. You can do it this way:
Console.time ("myTime"); // Starts a timer labeled myTime for (var i \u003d 0; i< 100000; i++){ 2+4+5; } console.timeEnd("mytime"); // Останавливает таймер с меткой myTime //Вывод - myTime:12345.00 ms
6. Output of variable values \u200b\u200bin the form of tables
Suppose we have such an array of objects:Var myArray \u003d [(a: 1, b: 2, c: 3), (a: 1, b: 2, c: 3, d: 4), (k: 11, f: 22), (a: 1 , b: 2, c: 3)]
If you display it in the console, you get a hierarchical structure in the form, in fact, an array of objects. This is a useful feature; you can expand the structure branches by viewing the contents of objects. However, with this approach it is difficult to understand, for example, how the properties of similar elements relate. In order to make it more convenient to work with such data, they can be converted to a tabular view. To do this, use the following command:
Console.table (variableName)
It allows you to display the variable and all its properties in a table. Here is how it looks.
Output of an array of objects in the form of a table
7. View item code
You can quickly jump to the item code from the console using the following commands:- Command inspect ($ (‘selector’)) allows you to open the code of the element corresponding to the selector in the panel Elements Google Chrome Developer Tools. For example, the command inspect ($ (‘# firstName’)) allows you to view the code of the item with the identifier firstName. Command inspect ($$ (‘a’)) will open the fourth link code that is present in the DOM.
- View Commands $0 , $1 , $2 Allow you to quickly jump to recently viewed items. For example, $0 will open the code of the most recently viewed item, and so on.
8. Listing item properties
If you need to look at the list of element properties, the console will help in this. The following command is used here:Dir ($ (‘selector’))
It returns an object containing the properties associated with the specified DOM element. As in other similar cases, the contents of this object can be examined by looking at its tree structure.
9. Calling the last result
The console can be used as a calculator; everyone probably knows this. But the fact that it has built-in tools that allow you to use the results of previous calculations in commands is known to few. Using construction $_ you can retrieve the result of the previous expression from memory. Here's what it looks like:2 + 3 + 4 9 // - The result of the summation is 9 $ _ 9 // The last result received is displayed $ _ * $ _ 81 // Since the last result is 9, we get 81 Math.sqrt ($ _) 9 // Square root from the last result, which was equal to $ 81 _ 9 // Again we get 9 - the result of the previous calculation
10. Cleaning the console and memory
If you need to clear the console and memory, use this simple command:Clear ()
After pressing Enter, a clean console will be ready for new experiments.
That's all.
11, 12, 13, 14…
Frankly, this is far from all. I showed just some of the unobvious features of the Google Chrome console. In fact, there are many more. I am sure you can expand my list with your own finds.I hope my story helped you learn about the Chrome console something useful, time-saving, worthy of becoming a part of the daily arsenal of a web programmer.


